
This blog continues my React/TypeScript miniseries and the previous blogs are:
1. Let’s start coding with TypeScript and React.js
2. React.js: A functional component and its state
In this blog, I’ll start developing an app that will let the user enter the name of the city and get the current weather there. I’ll develop this app gradually, and its first version won’t be fetching data from the weather server just yet. First, I’ll add a little HTML form to the App component, where the user will be entering the name of the city.
Second, I’ll add the code to fetch the real weather data from the weather server and the App component will display the weather.
Finally, I’ll create another component WeatherInfo, which will be used as a child of the App component. The App component will retrieve the weather data and will pass it to WeatherInfo, which will display the weather.
We’ll be getting real weather data from the weather service at http://openweathermap.org, which provides an API for making weather requests for many cities around the world. This service returns the weather information as a JSON-formatted string. For example, to get the current temperature in London in Fahrenheit (units=imperial), the URL could look like this: http://api.openweathermap.org/data/2.5/find?q=London&units=imperial&appid=12345
Creators of this service require you to receive the application ID, which is a simple process. If you want to run our weather app, do the same and replace 12345 in the above URL with your APPID.
The sample code for this weather app was initially generated by the following command:
create-react-app weather --typescript
Then, I replaced the JSX code in the app.tsx with a simple HTML form where the user could enter the name of the city and press the button Get Weather. Also, the entered city represents the state of this component, and the App will be updating its state as the user is entering the city name.
Adding a state hook to the App component
In the previous blog, you’ve got familiar with the useState() hook, and the first version of our App component defines its state with this hook as follows:
const [city, setCity] = useState('');
Now the value in the variable city has to be updated using the function setCity(). Our hook useState() initializes the variable city with an empty string, so TypeScript will infer the type of city as a string. The following listing shows the App component with the declared state, and the form defined in the JSX section. This code also has an event handler handleChange(), which is invoked each time the user enters or updates any character in the input field.
import React, { useState, ChangeEvent } from 'react';

const App: React.FC = () => {

const [city, setCity] = useState(''); // 1

const handleChange = (event: ChangeEvent<HTMLInputElement>) => { // 2
setCity(event.target.value); // 3
}

 return (
  <div>
    <form>
      <input type="text" placeholder="Enter city"
             onChange = {handleChange} /> // 4
      <button type="submit">Get weather</button>
    <h2>City: {city}</h2> // 5
    </form>
  </div>
 );
}

export default App;
1. Declaring the state city
2. Declaring the function to handle the input field events
3. Updating the state by invoking setCity()
4. Assigning the handler to the onChange attribute
5. Displaying the current state value
The input field defines the event handler onChange = {handleChange}. Note that we didn’t invoke handleClick() here; we just provided the name of this function. React’s onChange behaves as onInput and is fired as soon as the content of the input field changes. As soon as the user enters (or changes) a character in the input field, the function handleChange() is invoked; it updates the state, which causes the UI update.
There is no documentation on which types of the React events to use with specific JSX elements, and to avoid using an event: any as the argument in event handler functions, open the file index.d.ts in the directory node_modules/@types/react and search for “Event Handler Types”. This should help you to figure out that the proper type for the onChange event is a generic ChangeEvent that takes the type of a specific element as a parameter, i.e. ChangeEvent.
To illustrate the state updates, I’ve added the <h2> element that displays the current value of the state: <h2>Entered city: {city}</h2>. Note that for re-rendering the current value of the city, I didn’t need to write a jQuery-like code finding the reference to this <h2> element and changing its value directly. The invocation of setCity (event.target.value) forces React to update the corresponding node in the DOM.
In general, if you need to update the functional component’s state, do it only using the appropriate setXXX() function that’s returned by the hook useState():
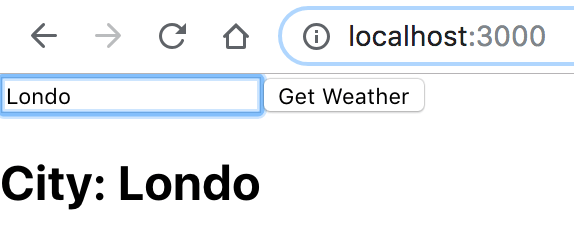
By invoking setXXX() you let React know that the UI update may be required. If you update the state directly (e.g. city=”London”), React won’t update the UI. React may batch the UI updates before reconciliating the Virtual DOM with the browser’s one. The following screenshot was taken after the user entered Londo in the input field.
To see that React updates only the <h2> node in the DOM, run this app (npm start) with the Chrome Dev Tools open in the tab Elements. Expand the DOM tree so the content of the the <h2> element is visible, and start typing in the input field. You’ll see that the browser changes only the content of the <h2> element, while all other elements remain unchanged.
Working with component’s state is an internal function of the component. But at some point, the component may need to start working with external data, and this is where the useEffect() hook comes in, which we’ll discuss in the next blog.
If you want to learn TypeScript quickly, get our book TypeScript Quickly.

One thought on “Using the React.js state hook in the weather app”